Showing posts with label cold working. Show all posts

Sunday, January 31, 2016

at the studio

 last year i had wanted to make some new work - just because. not for a show or anything. it didnt happen because i broke my wrist. this year i dont have much booked in for exhibitions, so i will try again to make work just because i want to.


this is the first time i have been in the cold shop since my wrist healed.
 

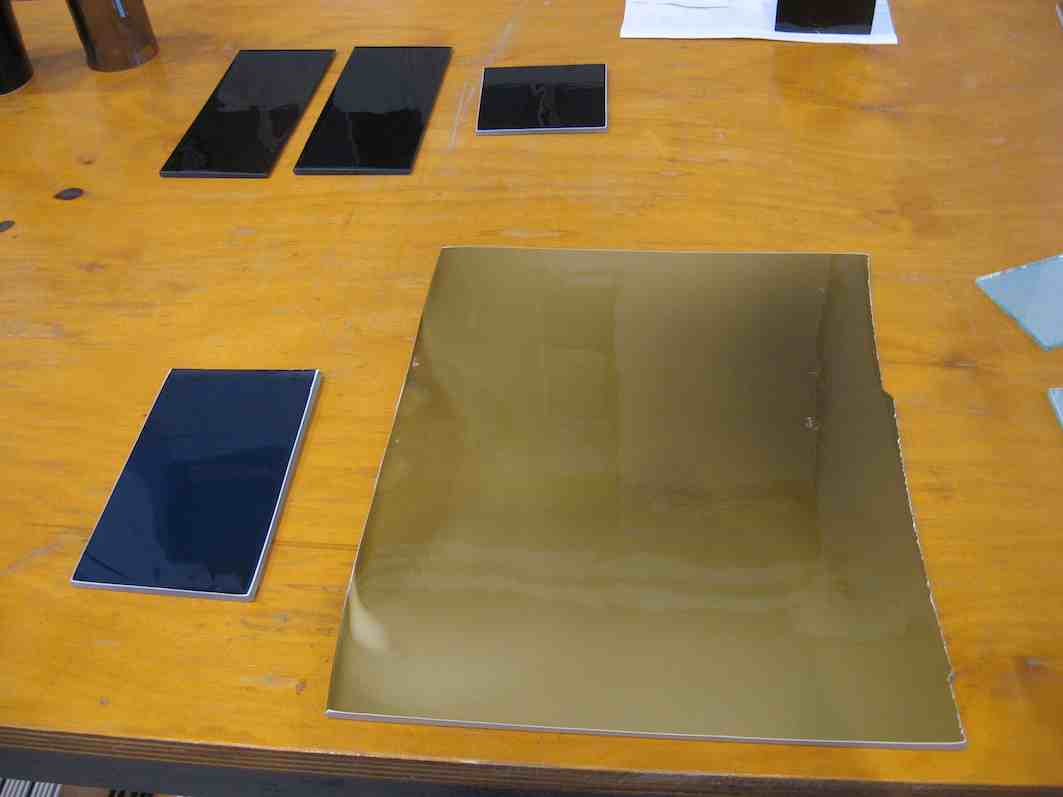
i had these glass pieces in my studio but they just need to be cold worked on the edges and the layout figured out. 


next is working on the imagery to be sandblast onto them. happily, my wrist held up pretty well from the cold working.


also here are 2 group photos from the other day when we all happened to be at the studio at the same time. this is a rare event, and it only lasted 10 minutes.

 
we need a group shot for some promo stuff - this one might work.

Sunday, September 21, 2014

back to work

after my trip to melbourne for my exhibition 2 weeks ago, last week was back to work in the studio. i have some pieces to make for a group show that opens in november.


i ordered a shiny sparkly new apron from here and it makes cold working fashionable and dry. also is nice not having a strap around the back of your neck


and in the cold shop my task was to cut these large cylinders so that they are ready to go in the kiln
 

i had to extend the bed of the diamond saw out to the left to hold the size of the saw, the clamp is holding the wooden bed in place. then i had to cut the base off of the cylinders


and while i was avoiding doing this cutting on the saw, once i got started it went really well.
 

both bottoms cut off the cylinders - easy.
 

then i had to extend out the saw bed in length again so that i could cut down the length of one side of each cylinder to remove a section. this looked even scarier, but again after avoiding this task, it all went incredibly well.
 

the section that is removed from one side of the cylinder will allow me to then set the cylinder up in a kiln to slump it open.
 

a couple hours later in my sparkle apron and all the tricky saw work is done. 3 cylinders ready to go tin the kiln. more on the tricky kiln work soon.

Thursday, August 14, 2014

work for upcoming exhibition complete

the other day i finally completed sandblasting the second half of the tiles for the multi panel tile wall piece.


as usual when i make this kind of work i wonder if the image is clear to others. i know what the image is but can you see what it is?


after the tiles were done the last step was to glue on the backings to the tiles. the glue takes 2 weeks to fully cure. the show goes up in 3 weeks, so i got it completed just in time.
 

the last collection of work for the show are individual wall tiles, here are the stencils i made monday night.


tuesday i spent 6 hours a the sandblaster, finishing off these pieces.
 

i am not sure if all will make the final cut, but now that they are done, I have glues on the hanging system as well. i hit the professional photographers next week, and will post images form them and the exhibition set up and opening next month.

now time to shift my focus back to some public artwork projects.

Thursday, July 3, 2014

colour tests

since getting back from overseas, i have had to start back in the studio pretty quickly. in the next 6 months i have a small solo exhibition in melbourne, i am part of a 4 person show in the barossa, i am part of a studio show for SALA, i have been shortlisted for an art prize, and i need to complete the large mirror project and finalise the last details of the public artwork project with the slate pavers and large bench seats. lucky i like lists and being organised. if i take one thing at a time, it will all get done. 


one of the first things I did was get some colour tests done for my sandblast and fire polished wall pieces. this is them sandblast with the stencils.


then i gave them a good clean


and let them dry. you can just make out the test pattern on the glass
 

from here they went in the kiln and were fired to 660 degrees
 

these are the results
 

some worked better than others, 
 

the test pattern was the same on each tile
 

some are just hard to photograph
 

but i think there is some potential in a few of them


i also did the same test panel in black, so i can compare it to the others. black is definitely the strongest results.


and white is definitely the most subtle result.
 

now i have lots of options for the work in my solo exhibition and the group show.

more info on what i am actually going to make for each project as it happens.

Sunday, January 26, 2014

new work

i have an exhibition that opens next month at canberra glassworks. i have sent over some of the most successful pieces from my last  show and made 3 new pieces as well. i also sent over detailed install instructions, as i will not be there to install the work myself. i will head over for the opening, and will post photos from that.


the new pieces are black tiles 61cm square that get an image sandblasted onto them and then they are fire polished in the kiln.


i made a couple pieces similar to these for a group show last year and they were well received and sold. i decided to make a few more, and as is the way with new work, the first 2 seemed effortless to make, and these next three were more troublesome.


my studio friend who is a photographer helped me document these new pieces.
 

i like them and think i will explore this technique some more, and do a few tests with other colour options and multiple panels. using this process will allow me to create really large wall installations. could be exciting.
 

trying out different types of imagery also helps me learn about the process, and how to make improvements for future work.

Monday, September 30, 2013

newest work completed

i have been working like a dog trying to get everything completed in time to get it all photographed. 


this is a new piece, its a black square of glass and the negative of the image has been sandblasted. then it is fire polished in the kiln. i still need to sort out how to hang this piece. and i made another similar one for another group exhibition that i am in.
 

this is the last piece i completed for the exhibition. i finished it and then quickly packed it up to get to the photographers last friday.

the photogrphy session was 3 hours, and i got all my new work documented. i will post some of these images after the show opens. 

i have 4 weeks now, until it opens, and in this time i need to resolve all the hanging systems for each piece and finalise titles, prices and other details for the gallery.

Saturday, September 21, 2013

new work progress

lately life has been working at the markets a couple days a week, working with deb on 3 different public commissions and then finding time outside of that full week making work for my exhibition. needless to say other aspects of life have fallen to the side (cleaning, hanging out with friends, sewing, spending time with borris). but i am working feverishly towards a photography deadline next week, so soon i can have a bit of a break. other than being pressed for time the actual work itself is going well. here is where i am at.


this is a collection of 5 black tiles that have been sandblasted and fire polished. they have images of native plants on them.
 

these pieces still have the stencil mask on them, i need to spray paint sections of them still before i take it off. inspired by hazard patterns. 


this is the finished wall piece that has been sandblasted into the surface of the tiles and then each tile has been slumped into a shallow dish form. 


this piece is done, it has been sandblasted and fire polished in the kiln. it is hard to get a nice image in the studio like this but it looks good. maybe a bit subtle, but i think it will be good. it will get installed on a black back board. 


here are some back boards that i am clear coating that will be used to display my sandblasted and spray painted mirrors, more on them soon.


this is the latest piece. i just spent the morning cutting the glass on the rail saw and planning the layout. still need to linish the edges and then sandblast this one. 
 
i have about 4 complete piece left to sandblast, and the one above to linish in the next 2 days before i return to work for the week to be ready for the photographers next friday . i think i will make it, just need to keep going.

Tuesday, December 4, 2012

last bit of cold working and packing - done!

yesterday started with a couple hours of cold working. i wanted to get all my work cold worked before it was packed. 


i had these smaller tiles, that will be used for enamelling and sandblasting. i smoothed out the edges, so they are ready for the stencils to be applied.
 

i also finished these 16 large squares to cold work. they will make up one large or 2 smaller wall pieces. again i smoothed out the edges so i can start planning and doing layouts for them back in my studio.


after that all that was left is packing all the work i have made up to be shipped home.  i got this huge bag of off cuts of foam for $20! in the end it looked like i didn't use any of it but it was very necessary to make sure things arrive safely.


everything is wrapped in many layers of bubble wrap and then packed into a box, putting foam around them and in between each piece making sure nothing can move in transit.


a few short hours later 5 boxes, packed and ready to get quotes. 

Saturday, November 24, 2012

are 20 images too many?

this is the last few days or week in review. i have been busy so i will keep this brief.


i have done another layer on the enamels. i think they will need one more after this and then they will be done. 
 

i have an idea on how to use enamels in my artwork and will do a test this week.
 

i made some more cylinders, these i will become flattened and then be used for a wall piece. 


i have been thinking of making a wall piece with the squares that have been slumped in a mold so they are shallow dishes. so the wall piece will not be totally flat.


i have been blowing glass 2 times a week. it has been great to be back in the hot shop. i really do enjoy it, and will hopefully continue making it into the hot glass studio in the new year. 
 

 and surprisingly i have remembered how to blow glass better than i thought i would, like riding a bike. 


this is a cylinder that has been flattened ready to be rolled up backwards. the next step is to be slowly heat them up in a kiln as below, with the colour side down.


 this is what my reverse rolls ups look like when i load them in the kiln before my session to warm them up. I heat them to 580 degrees before heating them in the glory hole and then rolling them up.


these are my first 2 reverse roll ups. they are smallish about 15 cm tall.
 

this is the result of one of my blowing sessions last week. 4 hours of fun and work. 


this is the image i am thinking of sandblasting onto the slumped plates. not sure about it yet, but think i need to do one to figure it out. I am not sure if it looks too machine made or mass produced. i think product needs more of a hand touch to be successful. there is no point making things that need to compete with items made for much less overseas, there needs to be a point of difference. 


these are the scraps i have been saving from cutting out sections of my cylinders. i really like the jagged edges and i am going to try and fuse them together into a new sheet of glass.


these are my new works. they are the first of the reverse roll ups. basically i made the cylinders with the colour on the inside as this is the easiest way to layer colour on a form. then i slump the cylinders open so the colour is on the surface. then i flip the sheet over so the colour is on the outside, heat it up and then roll it up backwards in the hot shop again.
 

these forms are best when i do as little as possible to them. these are around 30 cm tall.
 

they are like rolled up pieces of paper.
 

they can have movement and form.


there seems to be endless possibilities for the shape of them.


and they might not be done just yet either. while i like the solid colour and the fading colour i am thinking of sandblasting a super pixelated image into the surface of the colour to reveal the white. more of an abstract image than i have previously used in my work.


top view of the blue form. from the front it looks cylindrical, but it really is like a rolled up bit of paper. 


there is also the option is setting them up like more formal settings. maybe the vertical form is etched with image and the base is left plain. or maybe the base is printed paper in the shape of the flat form of the vertical section. 

not sure yet, but i am interested in exploring a few ideas.

so that was basically what i have been doing for the past few days. more to come with only 12 days of my residency left, i have a more work to do.